AWS provides several ways to reduce your cost but no other program is as flexible as the Compute Saving Plan. This article covers what you need to know to successfully and efficiently use the AWS savings program.
What are Savings Plans
Put plainly, all AWS cost-saving plans offer cost reductions compared to On-Demand prices, in exchange for a long-term commitment. That commitment is 1 or 3 years long and is an hourly spend commitment type.
AWS provides three types of Savings Plans:
- Compute Savings Plans,
- EC2 Instance Savings Plans, and
- Amazon SageMaker Savings Plans.
The focus of this article is on the most flexible type of savings plan which is the Compute Savings Plan.
Research, Research, Research
The first step we need to take is to see if there are any Recommendations. This page might tell you what AWS recommends to purchase. Not everyone gets this kind of suggestion as they are based on your usage.
Follow the next example to understand how to purchase a Compute Savings Plan.
A Simple Example: Get a Discount on a Single t4g.micro EC2 Instance
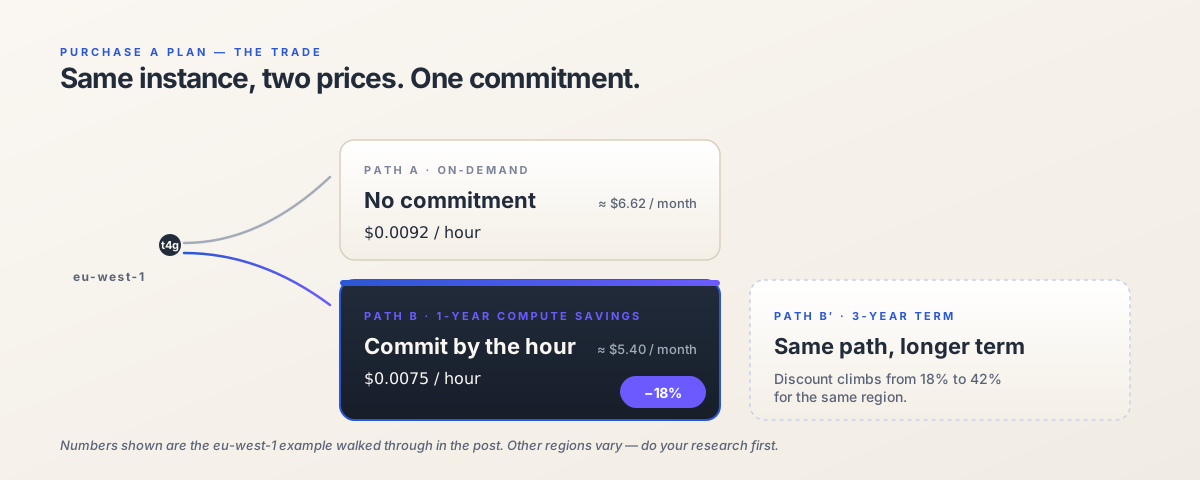
This is a straightforward example. In this example, the commitment is for 1 year in Europe (Ireland), the eu-west-1 region.
A very important note is to know that discounts vary from Region to Region so do your research beforehand.
Step 1: Check Your Bill
Find your bill in the AWS console. You can see something like this.

We identified that we are paying On-Demand prices for a t4g.micro EC2 instance.
Step 2: Identify the Savings Rate in Your Region
Find out in which region your EC2 instance is hosted. After that access the table at Savings Plan Compute Pricing page. That page will show you a table like the one below.
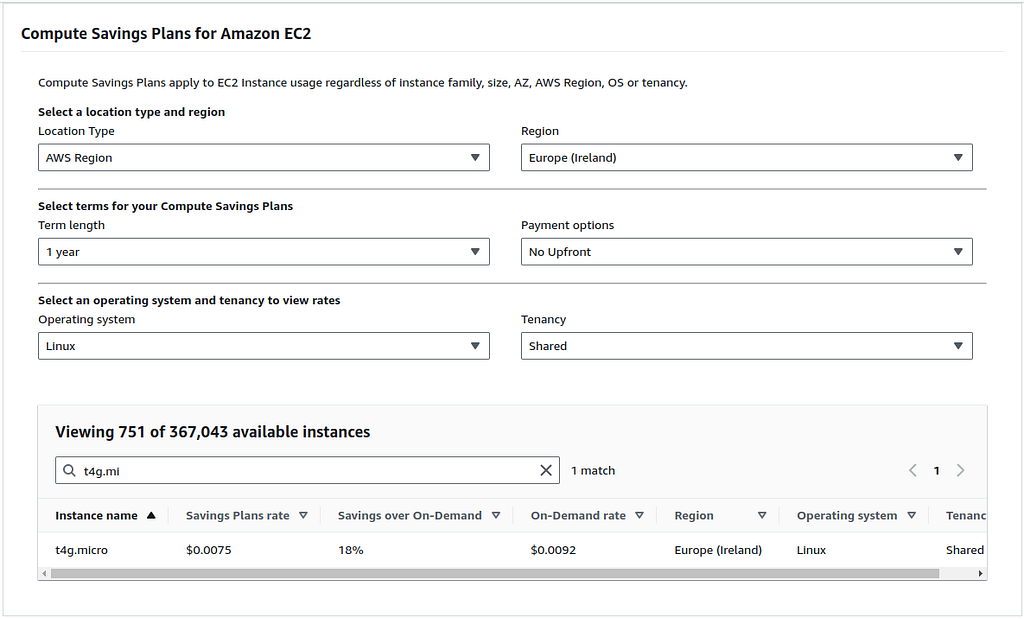
The goal is to get a discount on the usage of a t4g.micro EC2 instance.
- On-Demand rate — $0.0092 * 720 hours (hours in a 30-day month) = $6.624
- Savings Plans rate — $0.0075 * 720 hours (hours in a 30-day month) = $5.62500
- Savings over On-Demand — 18%
If you commit to a 3-year term the savings will be 42% instead of 18% for the Ireland Region.
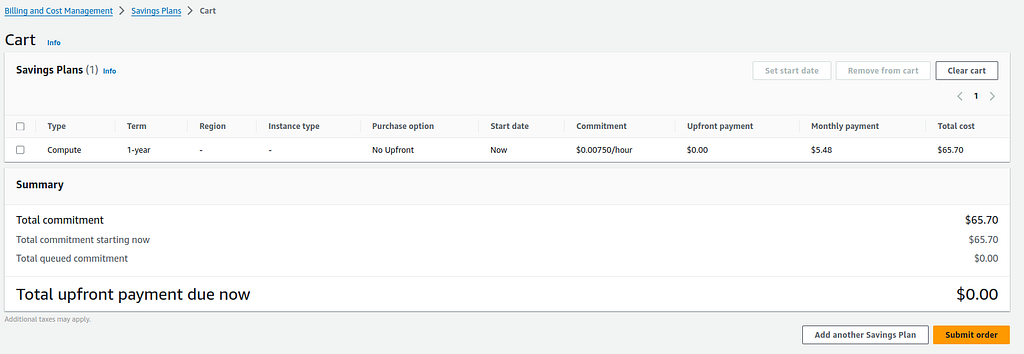
Step 3: Purchase a Plan
So the purchase plan will look like this.
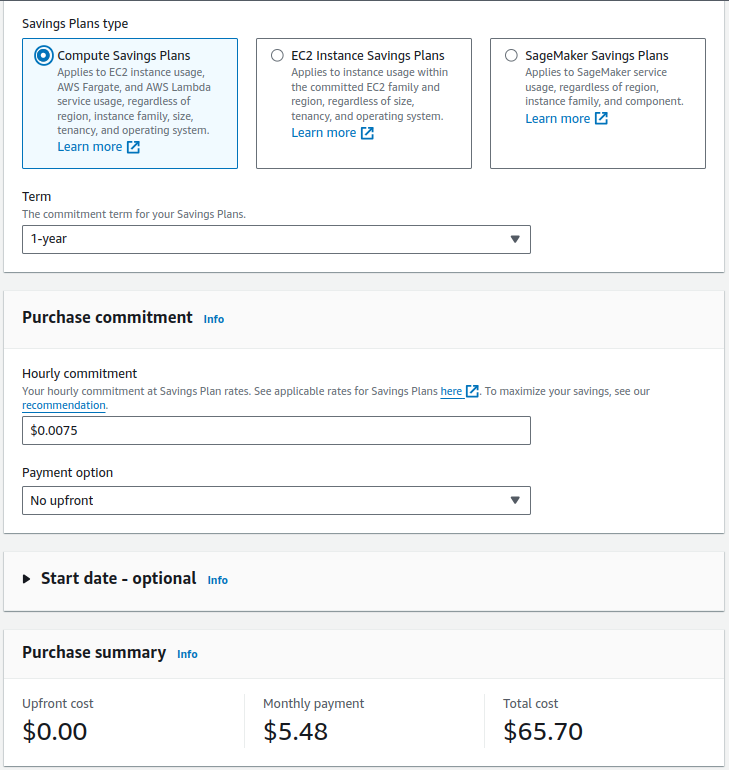
Important notes:
- Do not purchase large plans and over-commit.
- Purchase small plans and then monitor the coverage.
- If you need more coverage at a later period in time you can purchase additional savings plans.
The hourly commitment rate is the one after the discount — the Savings Plans Rate.
Reports Analysis
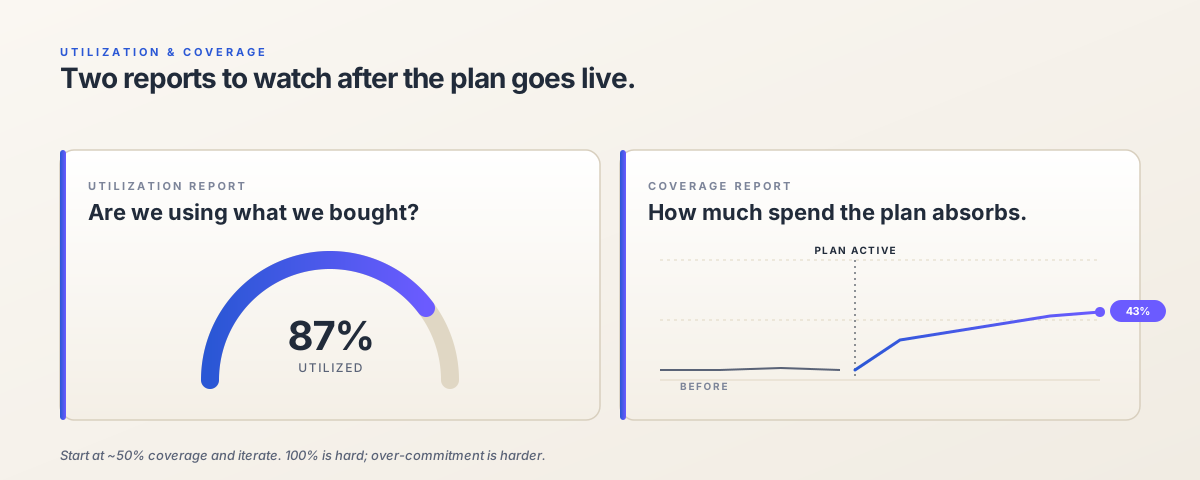
Utilization Report
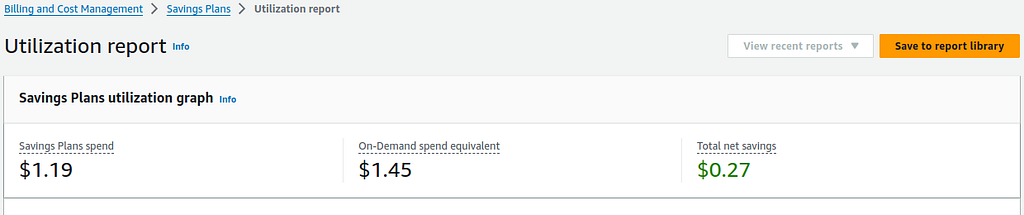
Below you can see a sample utilization report for a single day after the savings plan has been purchased.
Coverage Reports
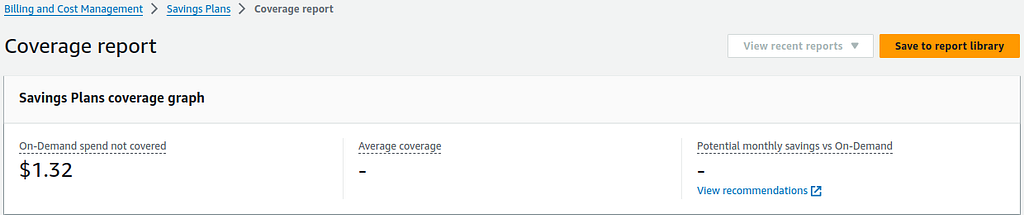
Under the “Billing and Cost Management / Savings Plan” menu, you can find the Coverage report. Here you can get information about how much of your spending has been covered by a savings plan during a certain period. You get information such as Average coverage, Potential monthly savings vs On-Demand, and On-Demand spend not covered.
Before Creating a Savings Plan
This is an example of a Coverage report showing no active Savings plan. It has yet to be activated.
After Creating a Savings Plan
This is an example of a Coverage report that shows an active Savings plan with a coverage of 43%
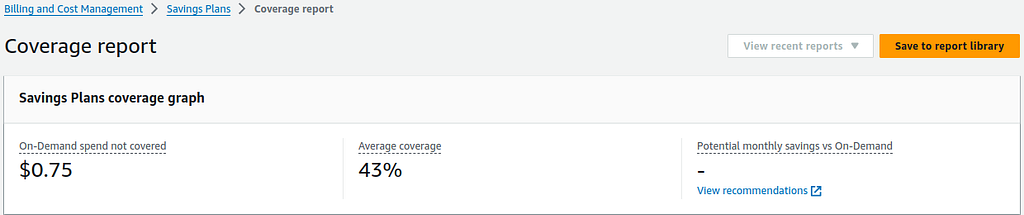
It is very difficult to get 100% coverage so start with 50% and iterate.
Do Your Research First
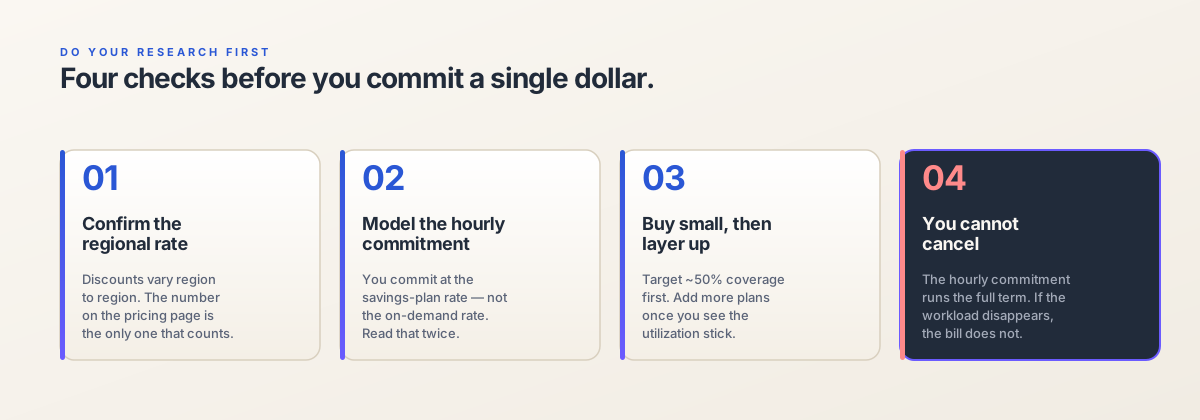
As described above Compute Savings Plan represents a flexible savings plan that supports multiple regions, and services and you commit to a dollar amount instead of an instance type or size. But there are dangers as if you calculate wrong then you are stuck paying that committed dollar amount.
If you purchase Savings Plans you commit to a certain dollar amount on a period and you can not cancel. Therefore be careful and do your research first before committing to any kind of Savings Plan.